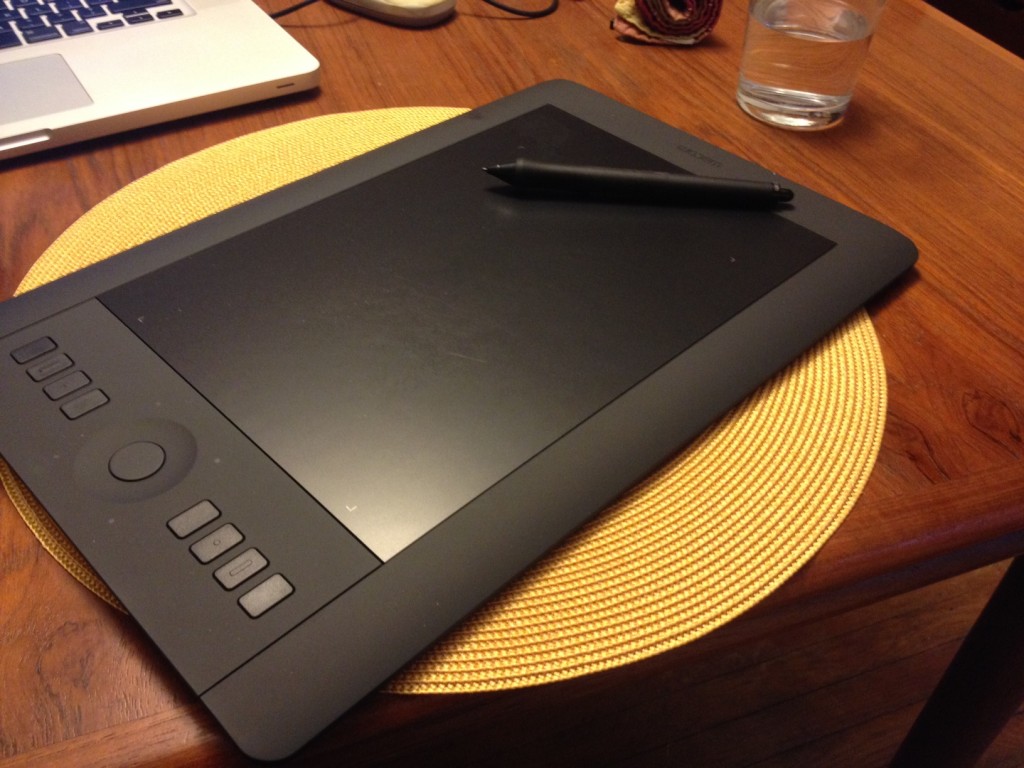
Last month I got a new gadget that I am extremely excited about. I’m not a huge gadget person, but this one has already paid for itself in terms of increased productivity. What is this amazing new gadget, you ask? It is none other than a Wacom tablet, the savior of illustrators and designers everywhere! Essentially, it’s a drawing surface that allows you to draw directly on your computer screen. It’s pressure sensitive, and you can draw just like you’re drawing in your sketchbook. It effectively cuts out the process of having to scan and illustration into the computer and clean it up for use in design projects. It’s an amazing timesaver, and I can’t believe that I didn’t invest in one sooner in my design career. I’m not really exaggerating when I say that it has changed my life as an illustrator.
Here it is–the new love of my life (sorry, Ben). She’s pretty, right?
Okay, enough raving.
When I bought the Wacom tablet, it didn’t come with any sort of a protective case. I expect that I might want to take it with me on occasion when I’m working remotely, in addition to the fact that it should probably be protected when stored at home, so I decided that I’d make a fabric case for it this month. Plus, I didn’t have a whole lot of extra time this month to sew due to the fact that I had a draft of a big report due just before Thanksgiving, along with obligations related to Greenbuild, the U.S. Green Building Council’s annual conference, for which I was on the host committee here in Philadelphia. (You might remember that I was involved in building the Legacy Project for the conference, which I wrote about a couple months ago on this very blog.) Oh yeah, and somewhere in there, I was working on a cover story about electric cars for a forthcoming issue of Grid Magazine. You get the point–it was a busy month with little time for sewing.
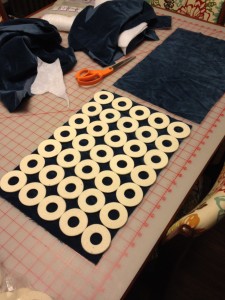 For a couple years, I’ve been trying to figure out what to do these really great felt rounds that I found at The Resource Exchange. They’re kind of thick, so I thought they might work well as extra padding for the case, in addition to being a cool design element. I bought some contrasting blue velvet at The Resource Exchange and thought I’d sew the rounds onto the velvet, then line the bag with some more velvet to make a thick, protective case.
At least that was the plan.
Unfortunately, it didn’t quite work out according to plan. Once I sewed the rounds to the velvet, they looked really cool, but when I doubled up the two pieces to make the front and back of the case, it was too thick to feed through my sewing machine. Total bummer. As a result, I have these two really cool rectangular pieces of fabric with felt rounds on them. I’m currently thinking they may become placemats, but if you have a better idea, let me know in the comments.
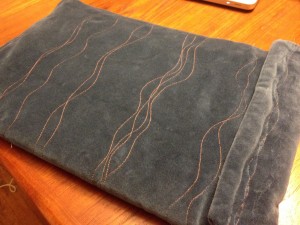
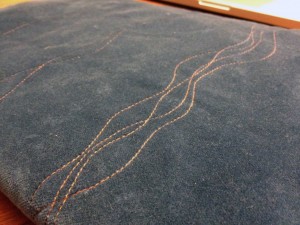
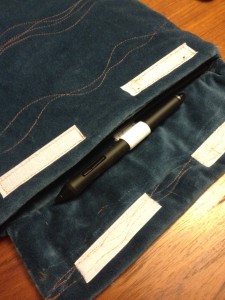
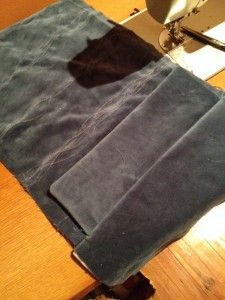 I went back to the drawing board. I still had a bunch of blue velvet left, but since I didn’t want to have a plain old blue tablet case, I decided to use some contrasting orange thread and sew some wavy lines on the velvet. It worked out well and added a little visual interest to the case. Because I didn’t have the extra padding from the felt anymore, I decided to use some leftover fleece I had on hand to cushion the case a bit. I sewed it in between the outside of the case and lining and attached the flap closure at the same time. The picture at right shows one half of the case with the flap and lining attached. You can see the contrasting orange lines if you look closely. (Don’t worry–there are better pictures below.)
It didn’t take too long to get the rest of the bag sewn together, but even without the felt, it was still pretty thick and challenged my sewing machine. I’m thinking there might be an industrial sewing machine somewhere in my future.
Sometimes I’m not so great at planning ahead, though, and I didn’t think to sew on the velcro closure before I assembled the rest of the case. The good news is that it ended up working out fine, as I sewed the velcro onto the flap using the same wavy line design as the rest of the case, so it looked alright. I also forgot to attach the elastic inside the case for securing the Wacom pen. Again, it worked out alright in the end, as I just had to stitch it in place by sewing a little square through the elastic and the back of the bag.
Check it out.
I think it looks pretty good, and regardless, it serves its purpose to protect the tablet. If I ever make something like this again, though, I’m going to make sure that I make the lining slightly smaller dimensions from the exterior. I made the inside and outside the same dimensions for this case, and as a result, the lining bunches up at the end of the case because there isn’t really enough space inside to accommodate it. The tablet still fits, but I think it could fit better. Ah well, lesson learned.
And actually, the biggest thing I’ve learned from designing things like this without a pattern is what a game of chess sewing can be. You really do have to think several steps in advance to envision how the assembly is going to work to make sure you don’t do things like accidentally stitch shut a hole you need to turn something inside out. (Not that I’ve ever done this. Wink, wink.) It might be the trickiest thing about sewing and the most enjoyable. When it all turns out right, it’s super rewarding.
And speaking of rewarding, only one more month of this project left until I’ve successfully completed a year’s worth of sewing projects! Onward!



Leave a Comment
Let us know your thoughts on this post but remember to place nicely folks!