I’m not sure if it’s because Mad Men has returned or if it’s something else, but I’ve really been wanting to make myself a pencil skirt. They’re super versatile, and they’re form-flattering. Since the weather’s getting warmer, and I only own about three summer weight skirts, I decided this was a good project for April. Your basic pencil skirt really only consists of three pieces of fabric–front, back and waistband (okay, really it’s four if you count the two halves of the back)–so I figured it would be pretty easy to make. Since I still consider myself at the beginner intermediate level when it comes to sewing, I figured this would be a fine project to tackle. There would be some opportunities to try some slightly more advanced techniques, like altering the pattern to get the right fit, and I had never sewn an invisible zipper to a piece of clothing before, so that would be a first.
I debated making myself a pencil skirt pattern using my measurements, as there were a few tutorials online, and this one especially looked good. In the end, though, I decided that it might be safer to find a pattern I liked and alter it. (I also didn’t have paper that was large enough to cut out the pattern, so that was also a deterrent.) As I mentioned last month, my mom has a whole bunch of patterns that she inherited when my grandmother passed away. A lot of them are from the 60s, so I thought I might be able to find a pencil skirt pattern in her stash, but no luck. I ended up purchasing a McCall’s pattern from Joann Fabrics (on sale for 99¢!). It was pretty close to what I wanted, so I figured I could make just a few alterations and be good.
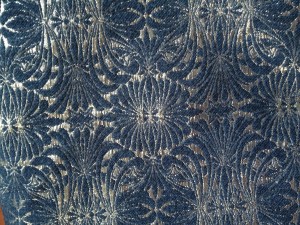 I found this great fabric at The Resource Exchange. It’s paisley, but with colors you often don’t see in a paisley–like coral and blue and peach and gold. I also found this other, absolutely gorgeous navy blue and silver material (see photo at left), but it was much heavier, which wouldn’t do for a summer skirt. I bought it anyway in the hopes that the first skirt would turn out well, and I could make a winter weight skirt out of the other material. They also had a box of random zippers there, so I picked one of those up, too. Score!
Once I opened up the pattern, I discovered that, although it called for lining material, it wasn’t, in fact, lined. It turned out that only the pockets (which I wasn’t planning on adding) were lined. I also really wanted a slit in the back to make it easier to walk, but the pattern didn’t call for that. The pattern also said that it was “semi-fitted,” and I wanted something that fit like a glove, so I had the feeling I’d have to take the skirt in on the side seams.
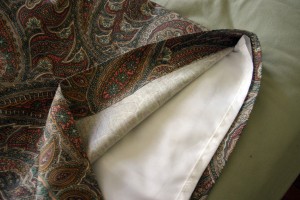
Adding a lining didn’t seem terribly difficult. I assumed that I could just make another skirt inside out from the lining material and attach it at the waistband to the rest of the skirt. Mom’s Sewing Hotline confirmed that, indeed, I could easily do that. (Thanks, Mom!) The slit in the back seemed like more effort, as I was going to have to alter the pattern. I looked carefully at another pencil skirt I own to see how the slit works, and once I figured out how it was constructed, I drew the outline on the reverse side of the fabric where I would have to cut the pattern differently to allow for the slit. However, being the forgetful idiot I am, when I cut out the pattern, I completely forgot about the alteration (note to self: don’t mark future pattern alterations with white chalk on white-ish fabric), and cut the extra fabric off that I would have needed for the slit. Oh well–guess I wasn’t destined to have a slit up the back, which really just meant that I wouldn’t be able to taper the bottom of the skirt too severely.
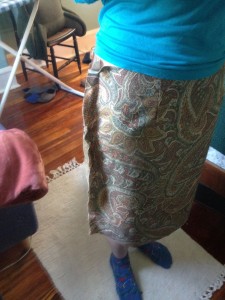 McCall’s says that I could fit-as-I-sewed this particular pattern, so I did that as best as I could. I quickly discovered that it’s kind of challenging to fit your own clothes. One–it’s hard to reach certain places. Two–it’s hard to see what you’re doing around your backside. And three–the material shifts as you bend over and move to pin things. Plus, it’s really annoying to constantly be taking your pants off and on to check fit, and I wasn’t down with sewing in my undies. But eventually I got it to where I thought it would fit the way I wanted it to when I sewed it. It was still a little nerve-wracking to sew it up, though, and see if I had done it right.
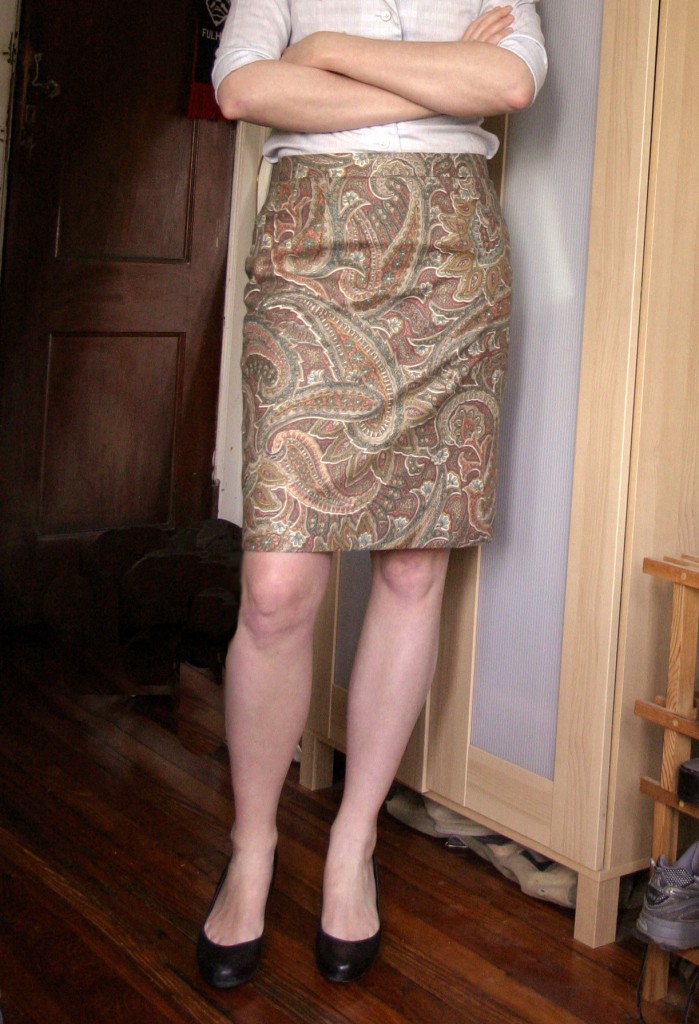
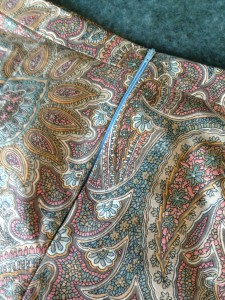 As I mentioned before, adding a zipper was something I hadn’t done before, and I’m not sure I did it 100% right, but it lies reasonably flat on the finished skirt, so I think I must’ve gotten it close. (You can also see the pretty paisley up close and personal here.)
In the end, the lining added a little complexity, especially around the zipper, but I’m really glad that I went to the extra effort to add the lining because the skirt feels good and it moves nicely with my body.
So I think I’ll consider this month’s project a success–the skirt fits perfectly, and it’s going to go well with a lot of shirts I already own. Ben asked me if I think I’m getting any faster at sewing, and I don’t really feel like that’s happening yet, but I assume that’s partially because I keep trying new things that require me to learn new skills. I would imagine if I made this skirt again, it would take a fraction of the time it took on this attempt. I’ll let you know if my hypothesis holds true when I make the winter skirt out of that lovely blue and silver fabric! In the meantime, behold–the timeless pencil skirt!


Leave a Comment
Let us know your thoughts on this post but remember to place nicely folks!